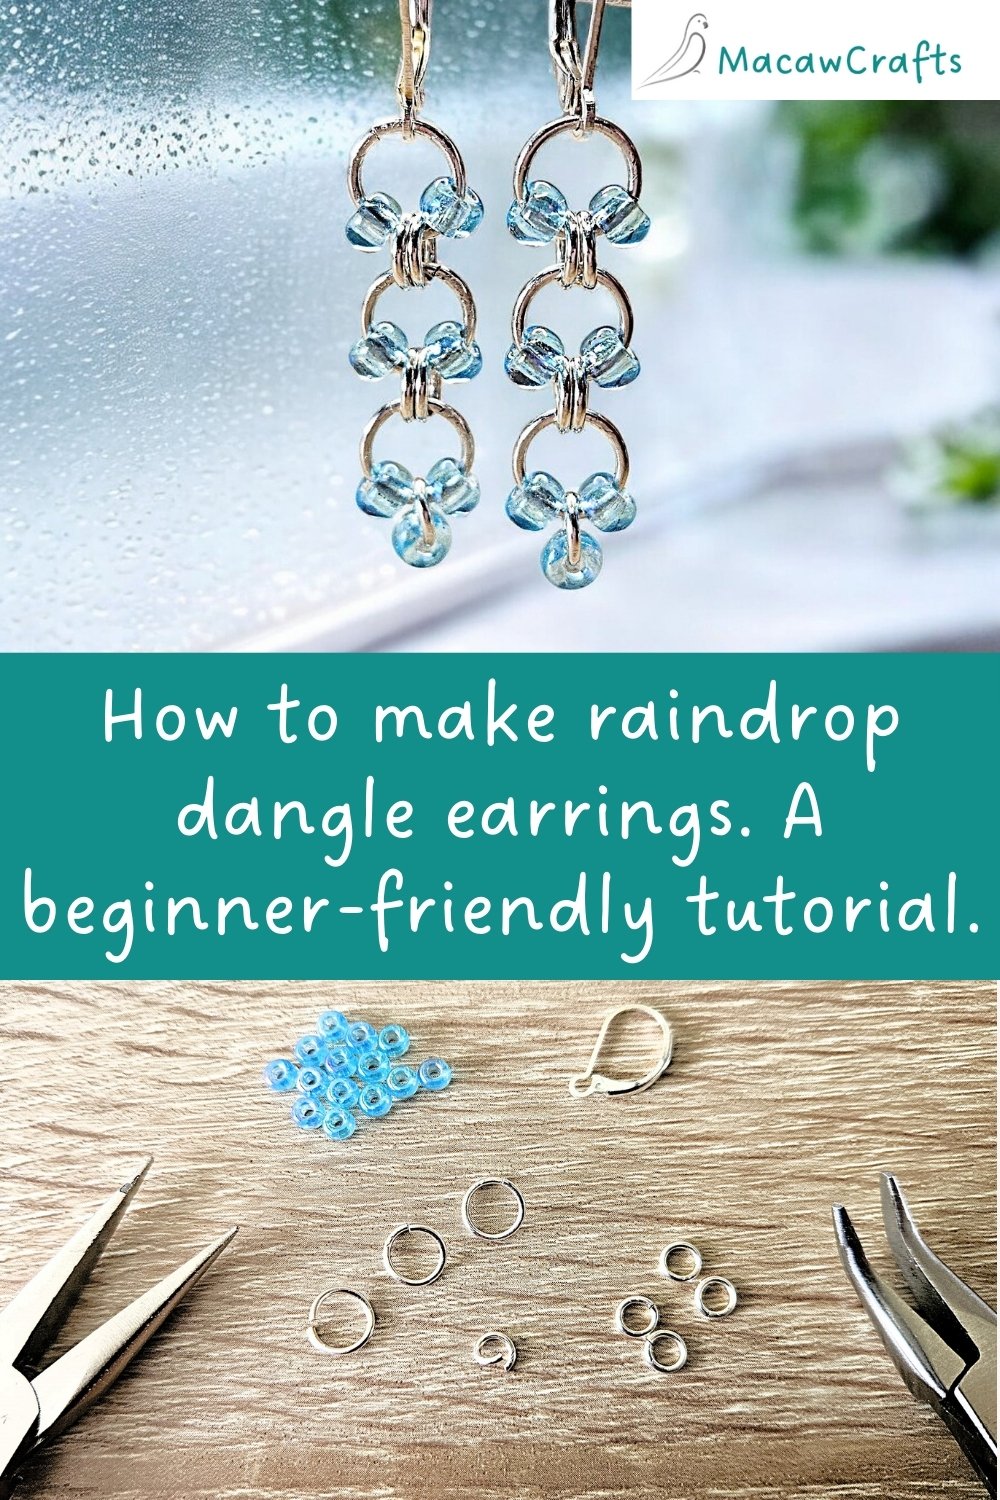
How to Make Raindrop Earrings with Seed Beads and Jump Rings
Hello crafty friends,
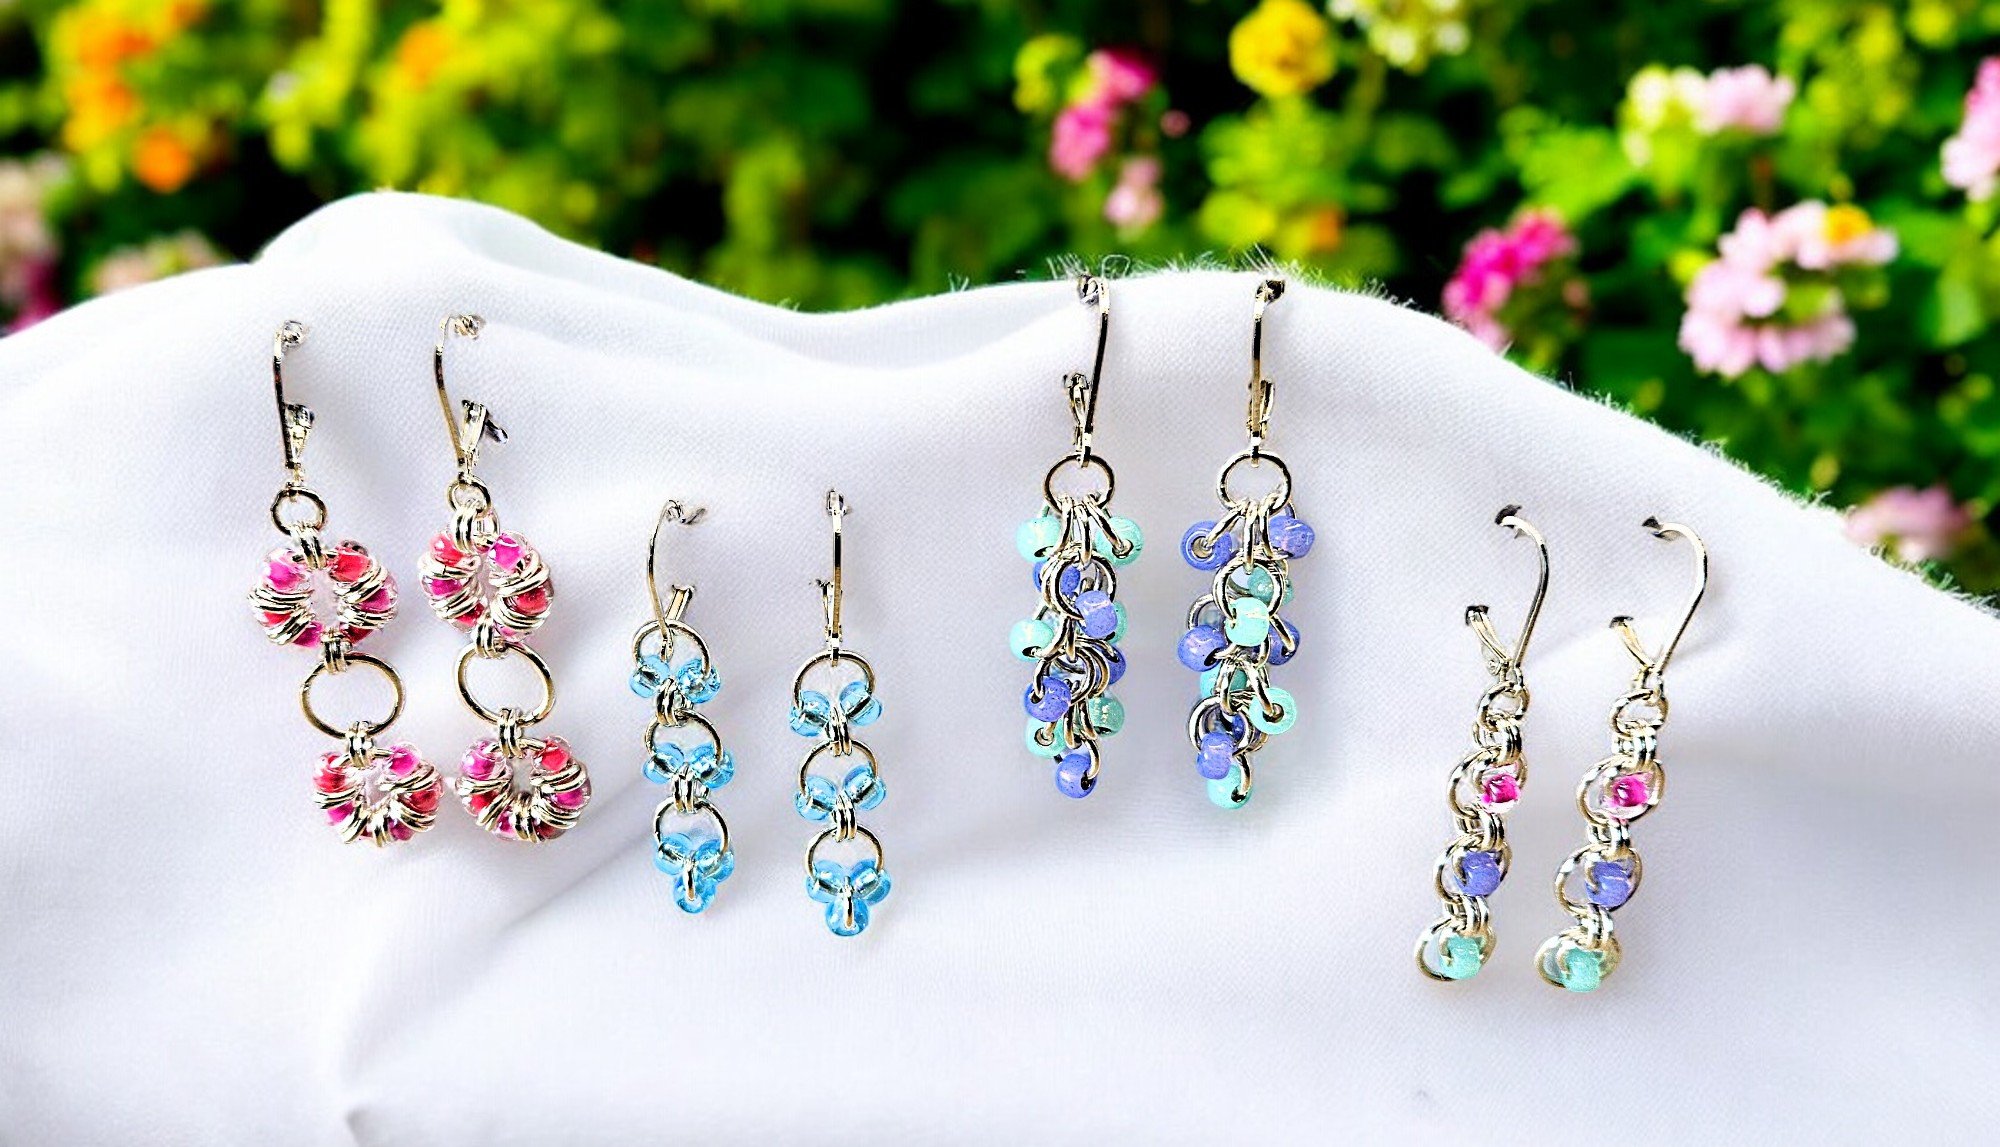
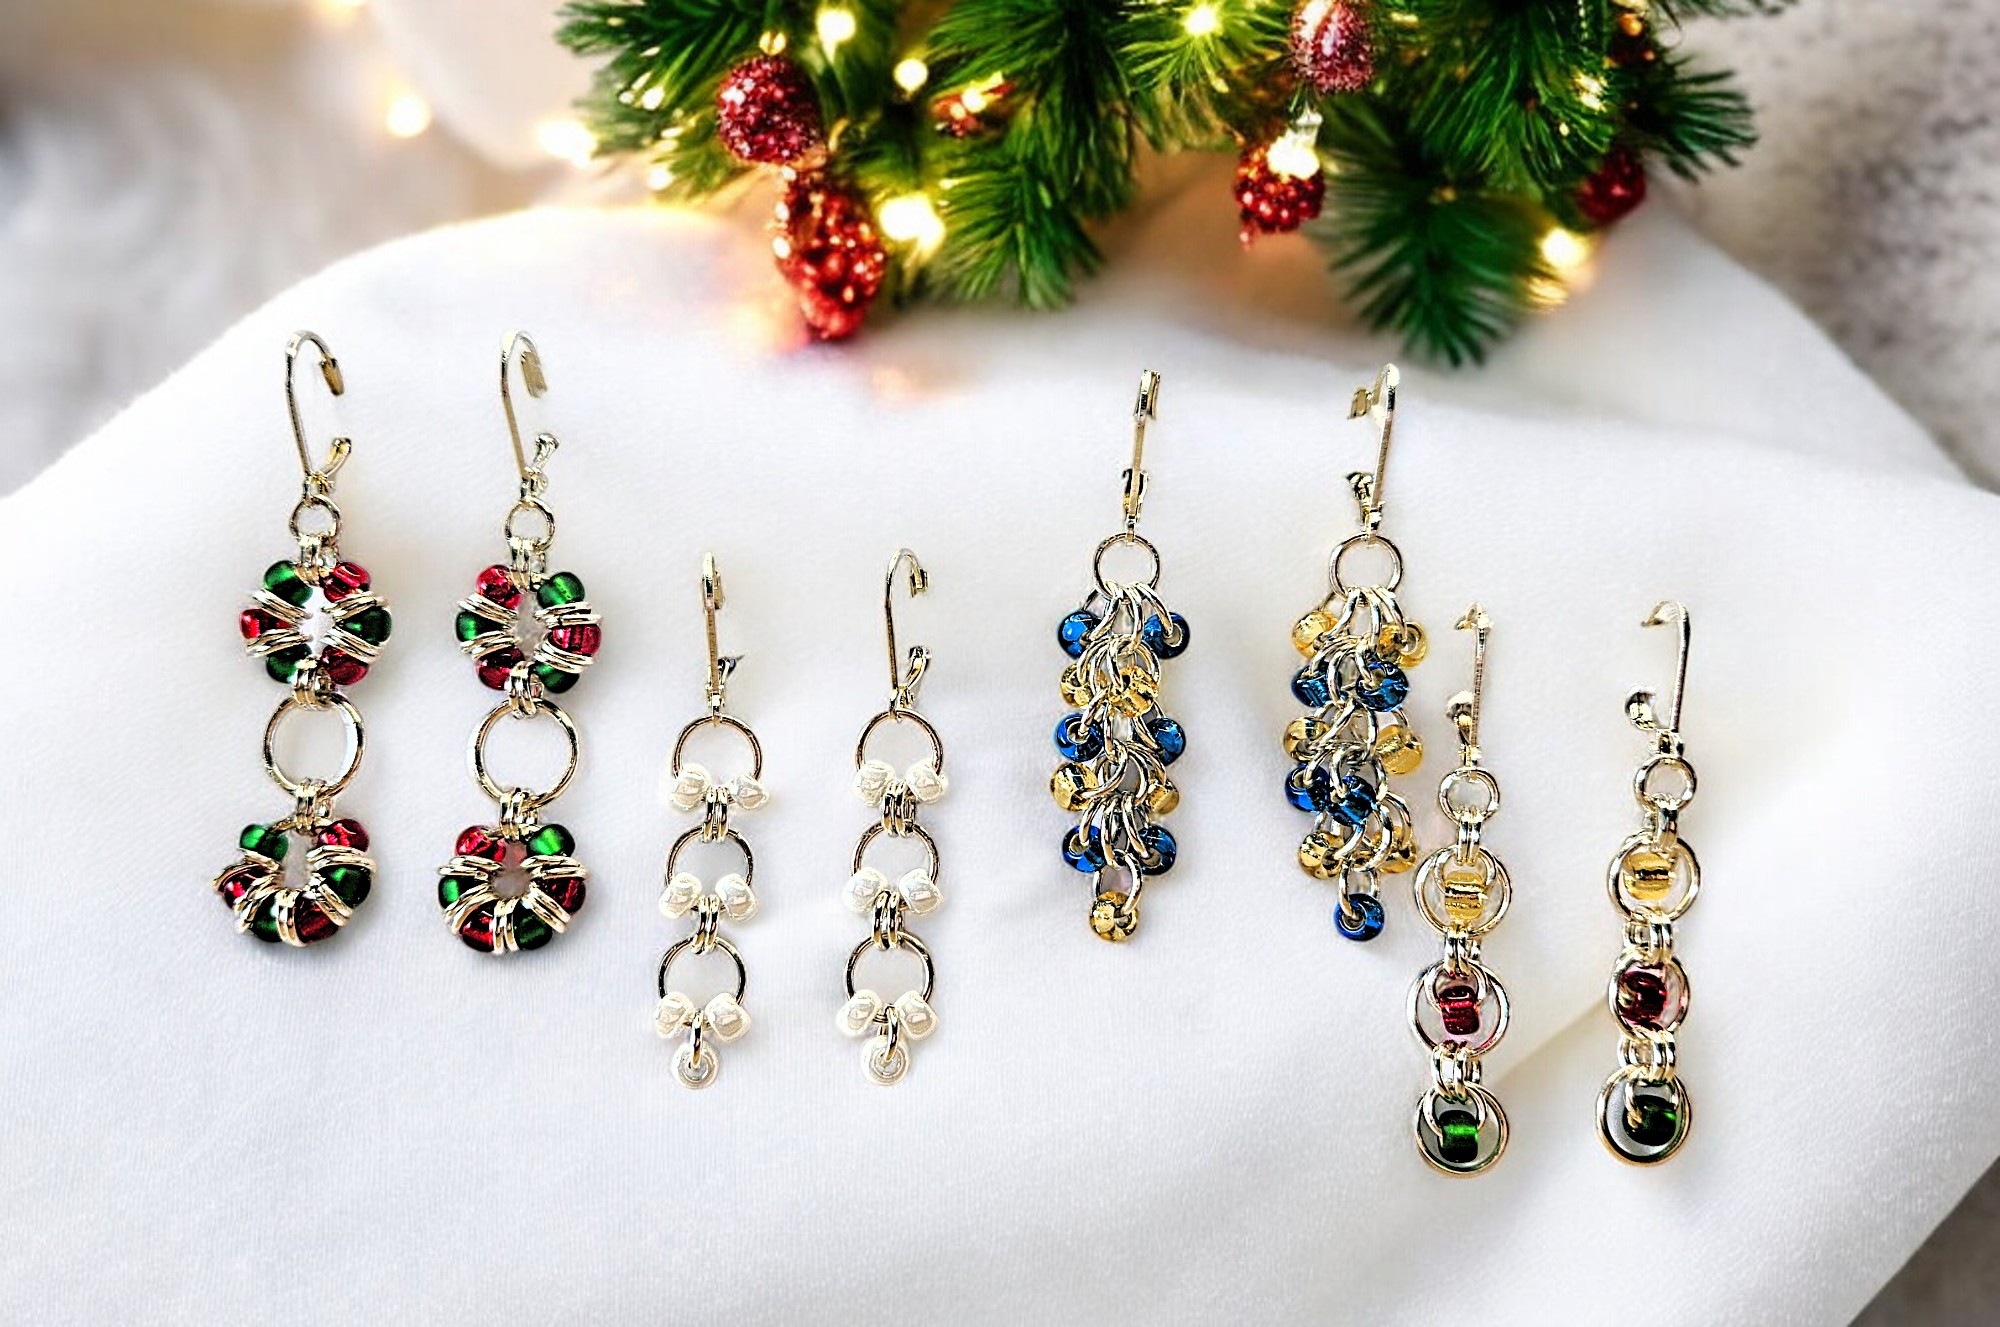
Today is the day that I post my 5th and final design and tutorial in my dangle earrings with seed beads series! Anyone who reads my newsletters might be wondering what happened to the design that I showed you a few weeks ago that has not appeared in the series - I WILL post a tutorial of that at some point, I promise. I made some changes when I realised I wanted to focus on beginner tutorials for now, so I can offer you all a nice beginner kit in my Etsy shop (scroll down for the link at the bottom of this post).
As always, for any newbies who have discovered my blog, here's a video with a demo of how to open and close jump rings correctly, before you get started, just in case you need it.
You will need:
- 14 x size 6 seed beads
- 6 x 6.5mm jump rings (1mm thick wire)
- 10 x 3.5mm jump rings (1mm thick wire)
- 2 ear hooks
- 2 pairs of smooth-jawed jewellery pliers
A note about the jump rings:
This design is pretty flexible when it comes to ring sizes. I started out with 3mm jump rings for the small rings, but I prefer the more elongated look I get with 3.5mm rings.
A note about the seed beads:
I always use Miyuki seed beads, because they have uniformly sized holes of 1.5mm. I forgot my own advice the other week and bought a bag of cheap seed beads - needless to say, they are useless - now I need to head to a Facebook destash group and hope somebody else can use them :(
Raindrop Dangle Earrings Tutorial
Step 1:
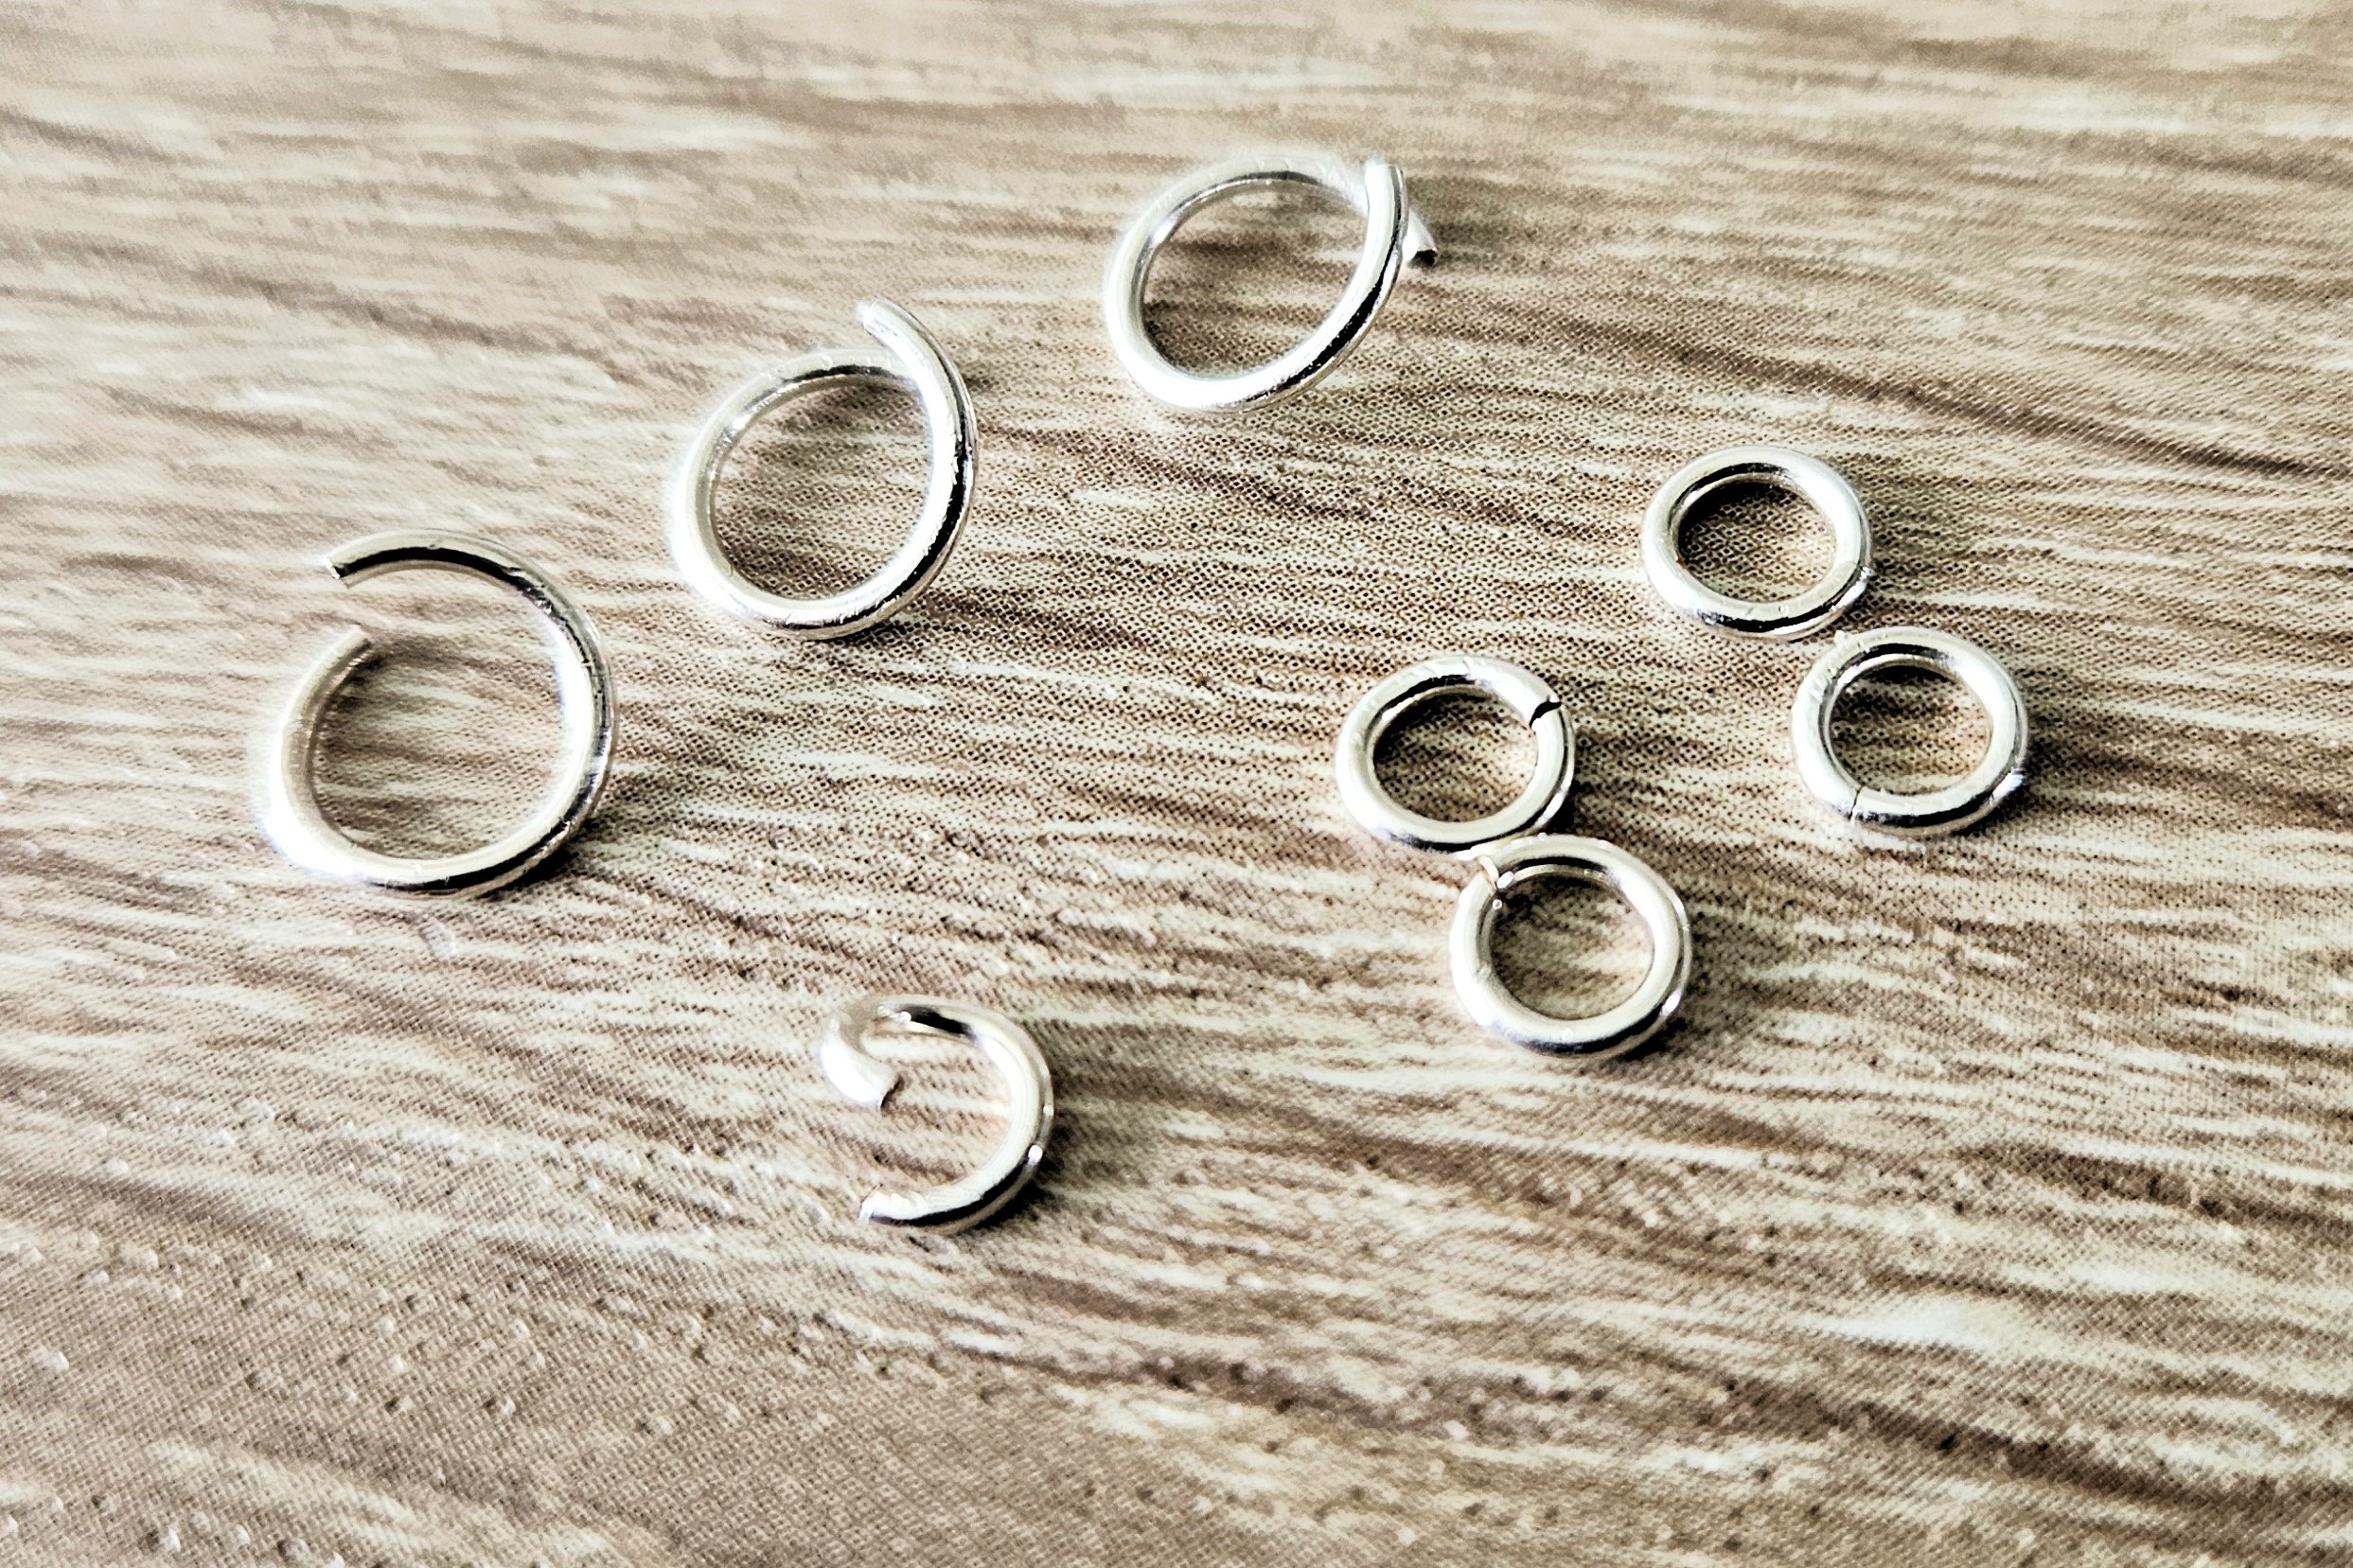
I have found it really helpful to pre-open and close the rings for this one. So, open 3 of your large rings and one of your small rings, then close 4 of your small rings.
Step 2:
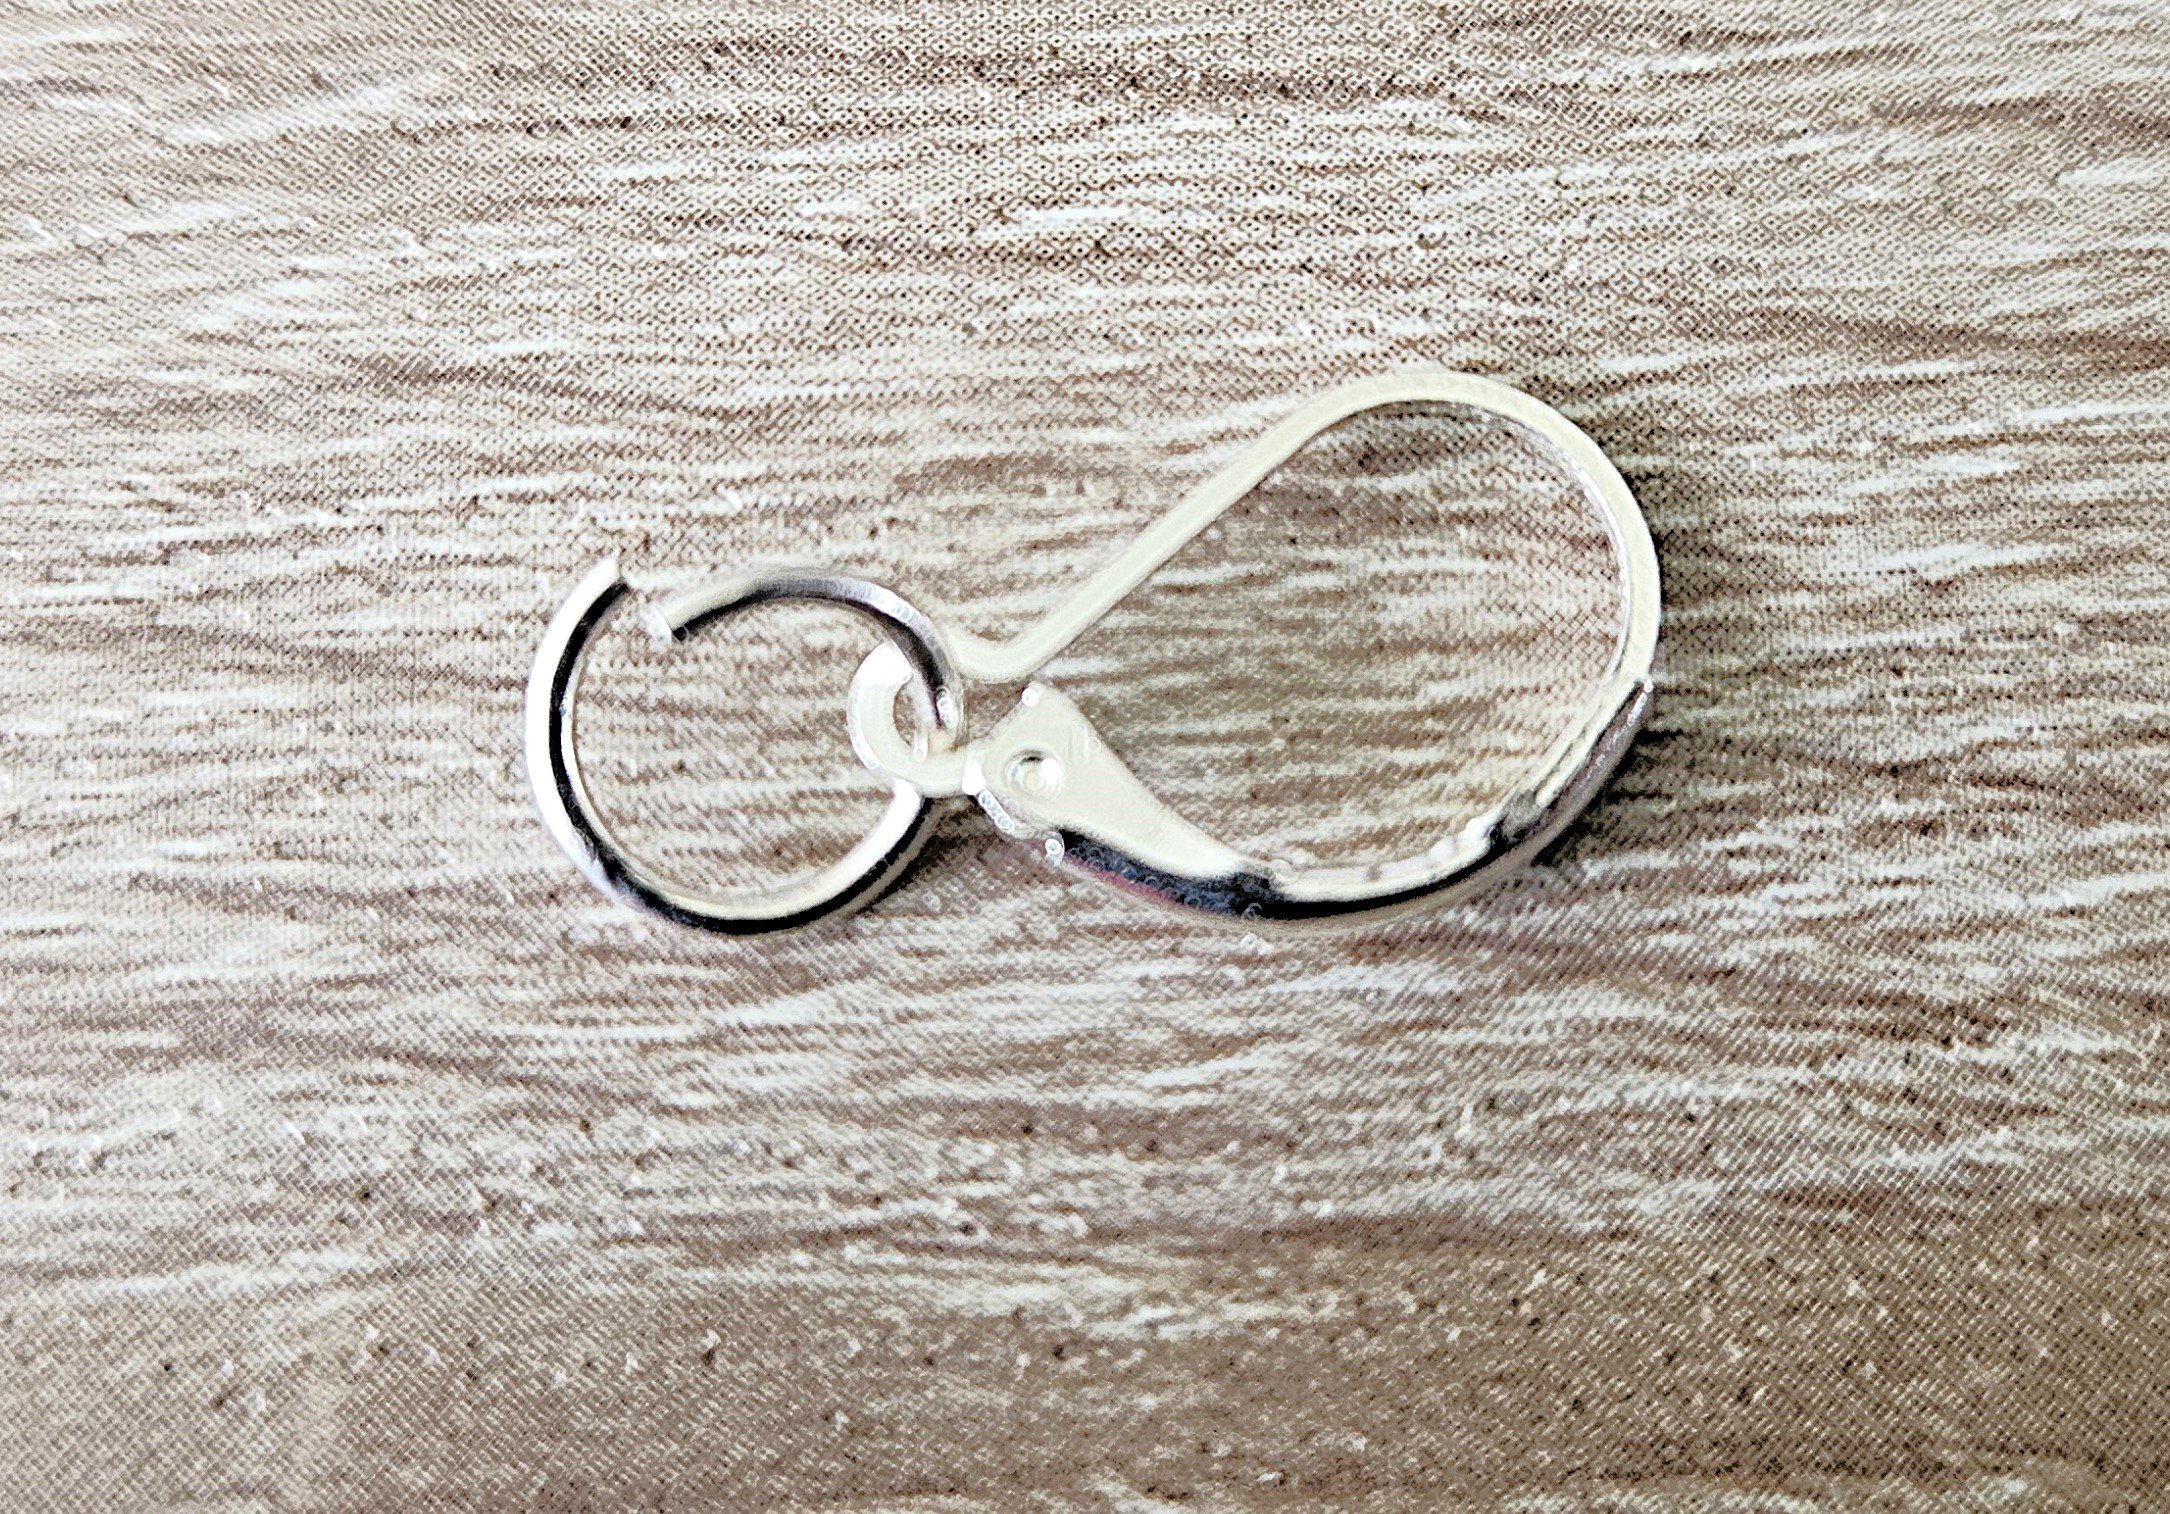
Take a large ring and loop it through the hole in the ear wire. Leave it open for now.
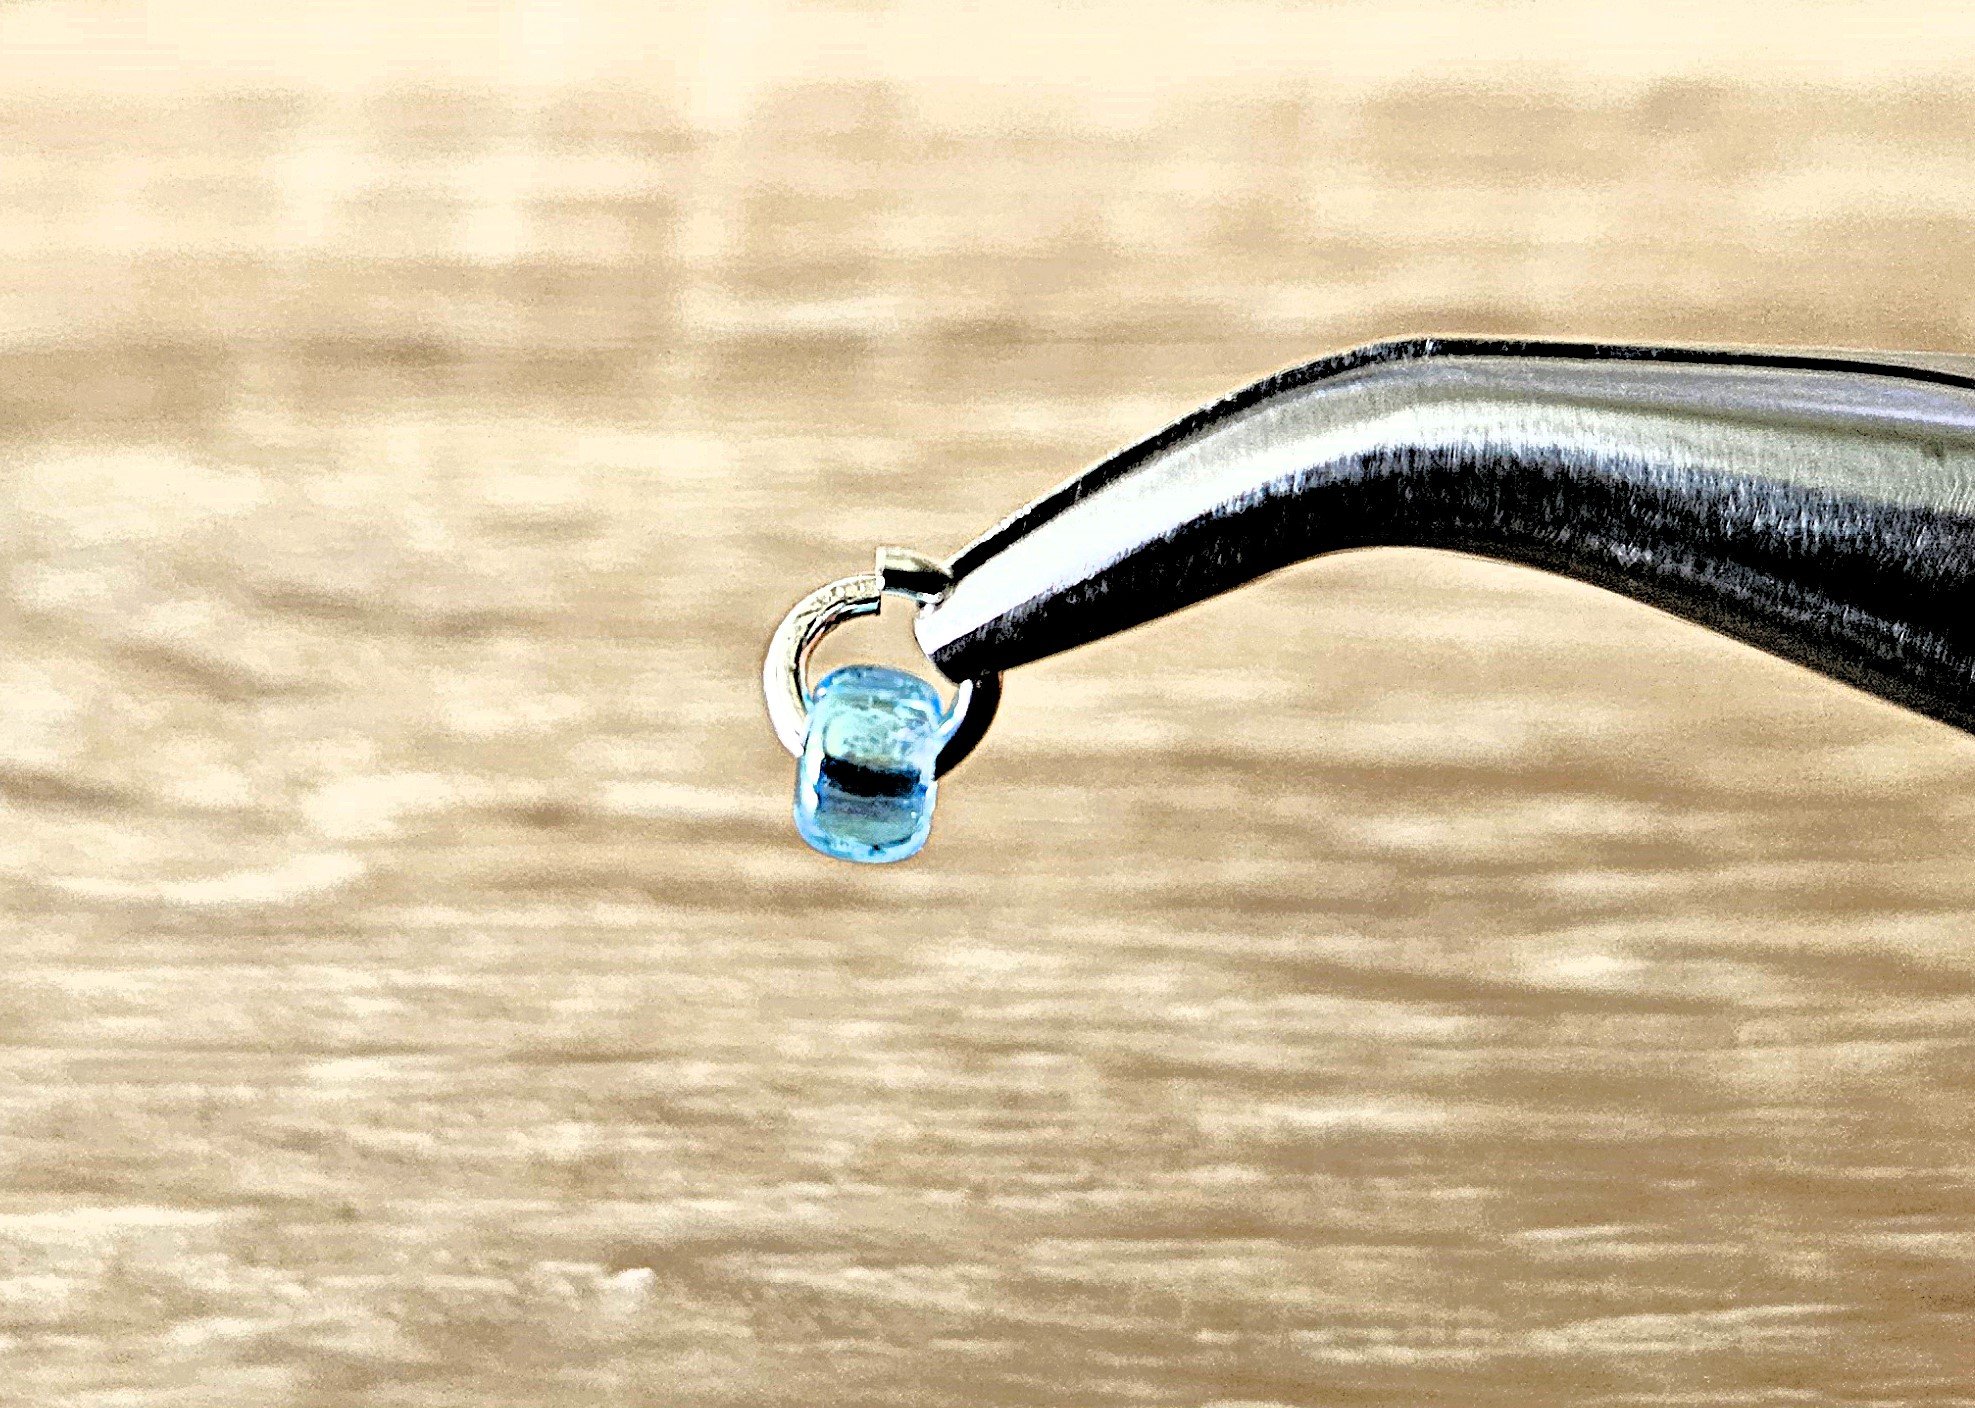
Step 3:
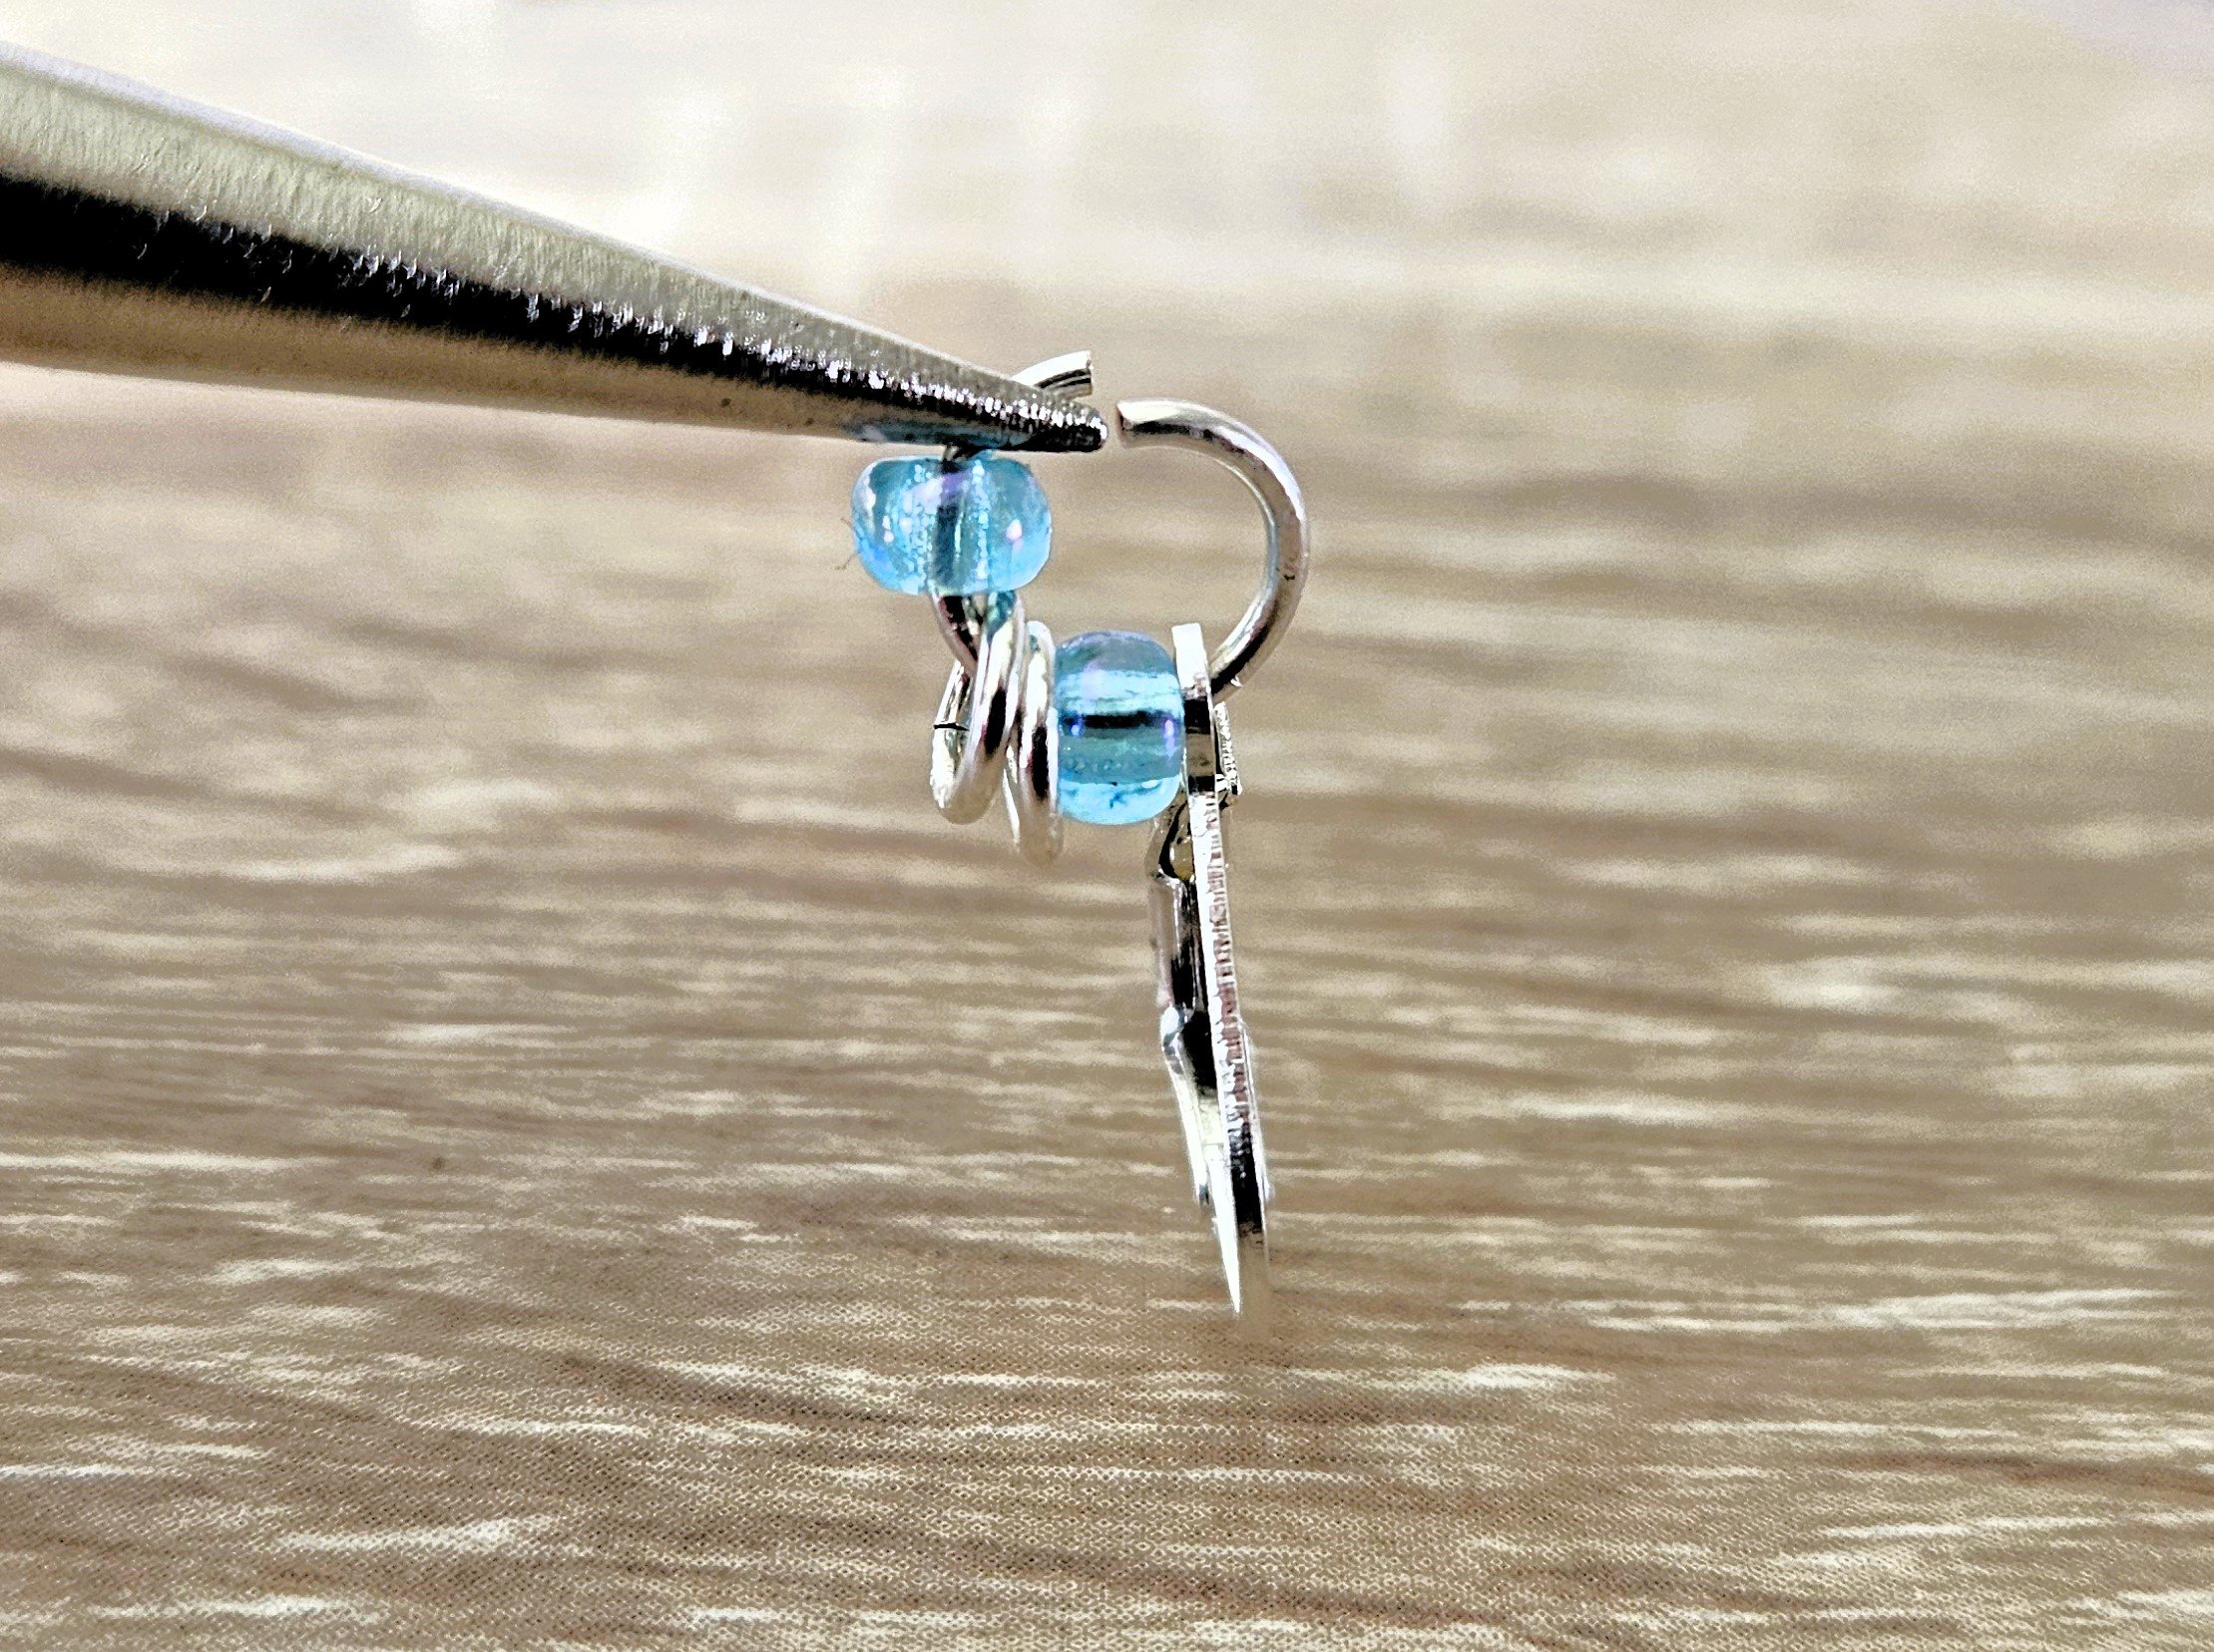
Add a a seed bead, then 2 closed small rings, then another seed bead to one side of your large open ring. You can hold the other side with your pliers while you do this.
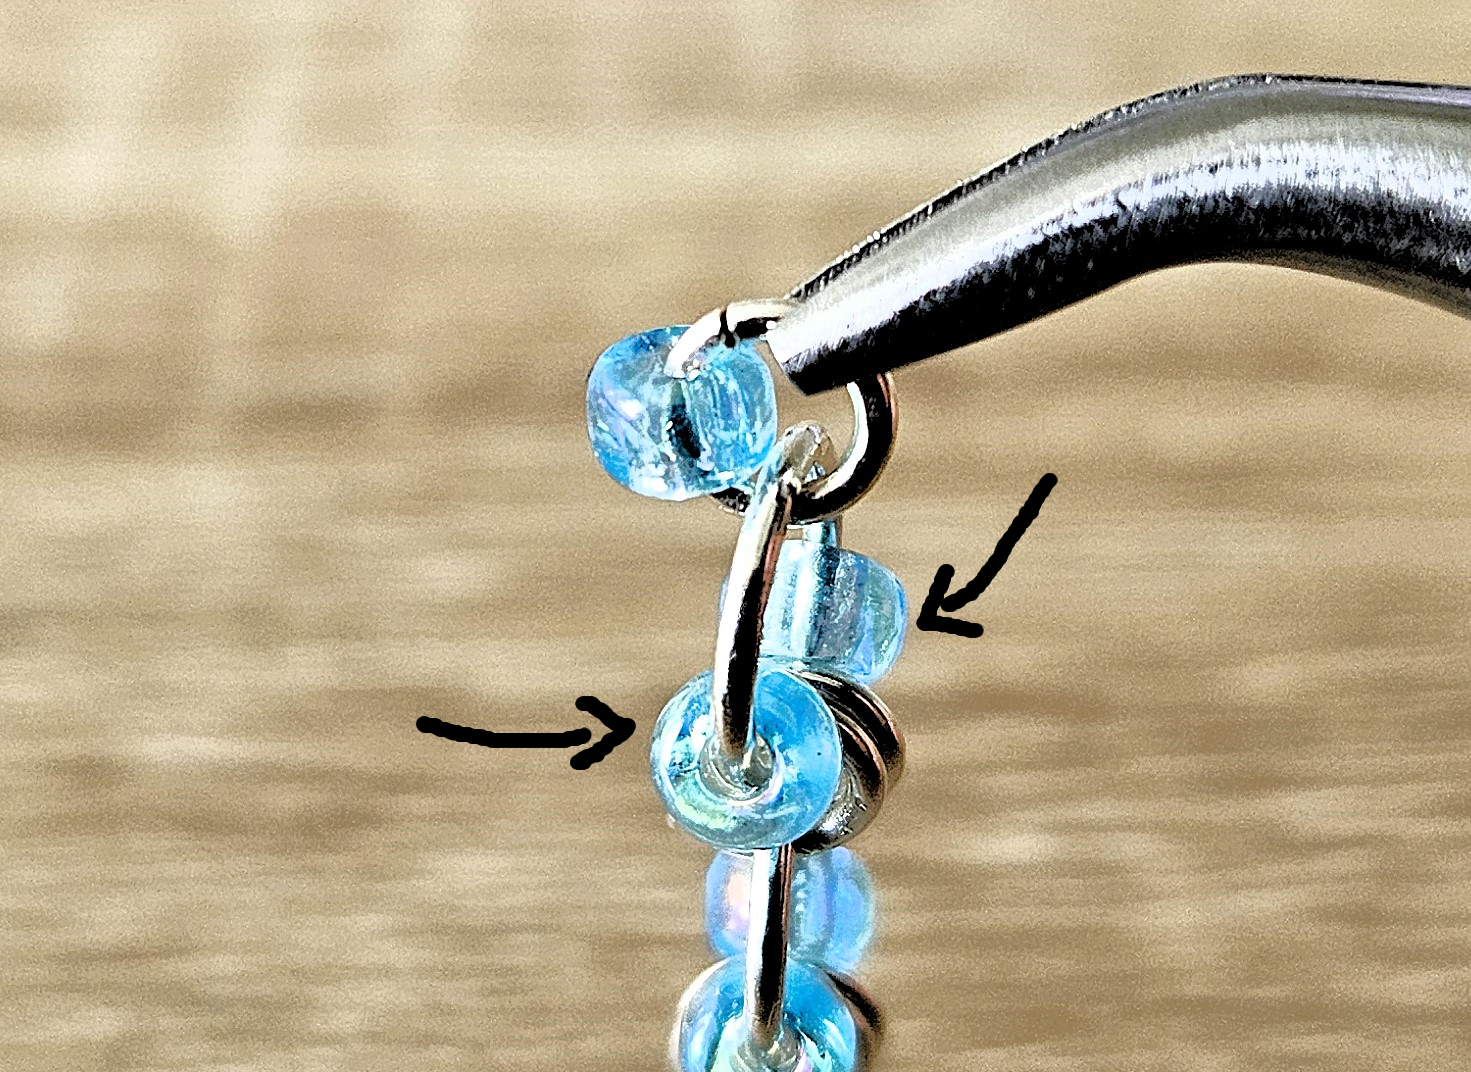
Step 4:
Close your large ring and flip it down to check that everything is in the right place so far. If it looks like the pic, then you're good to go to step 5!
Step 5:
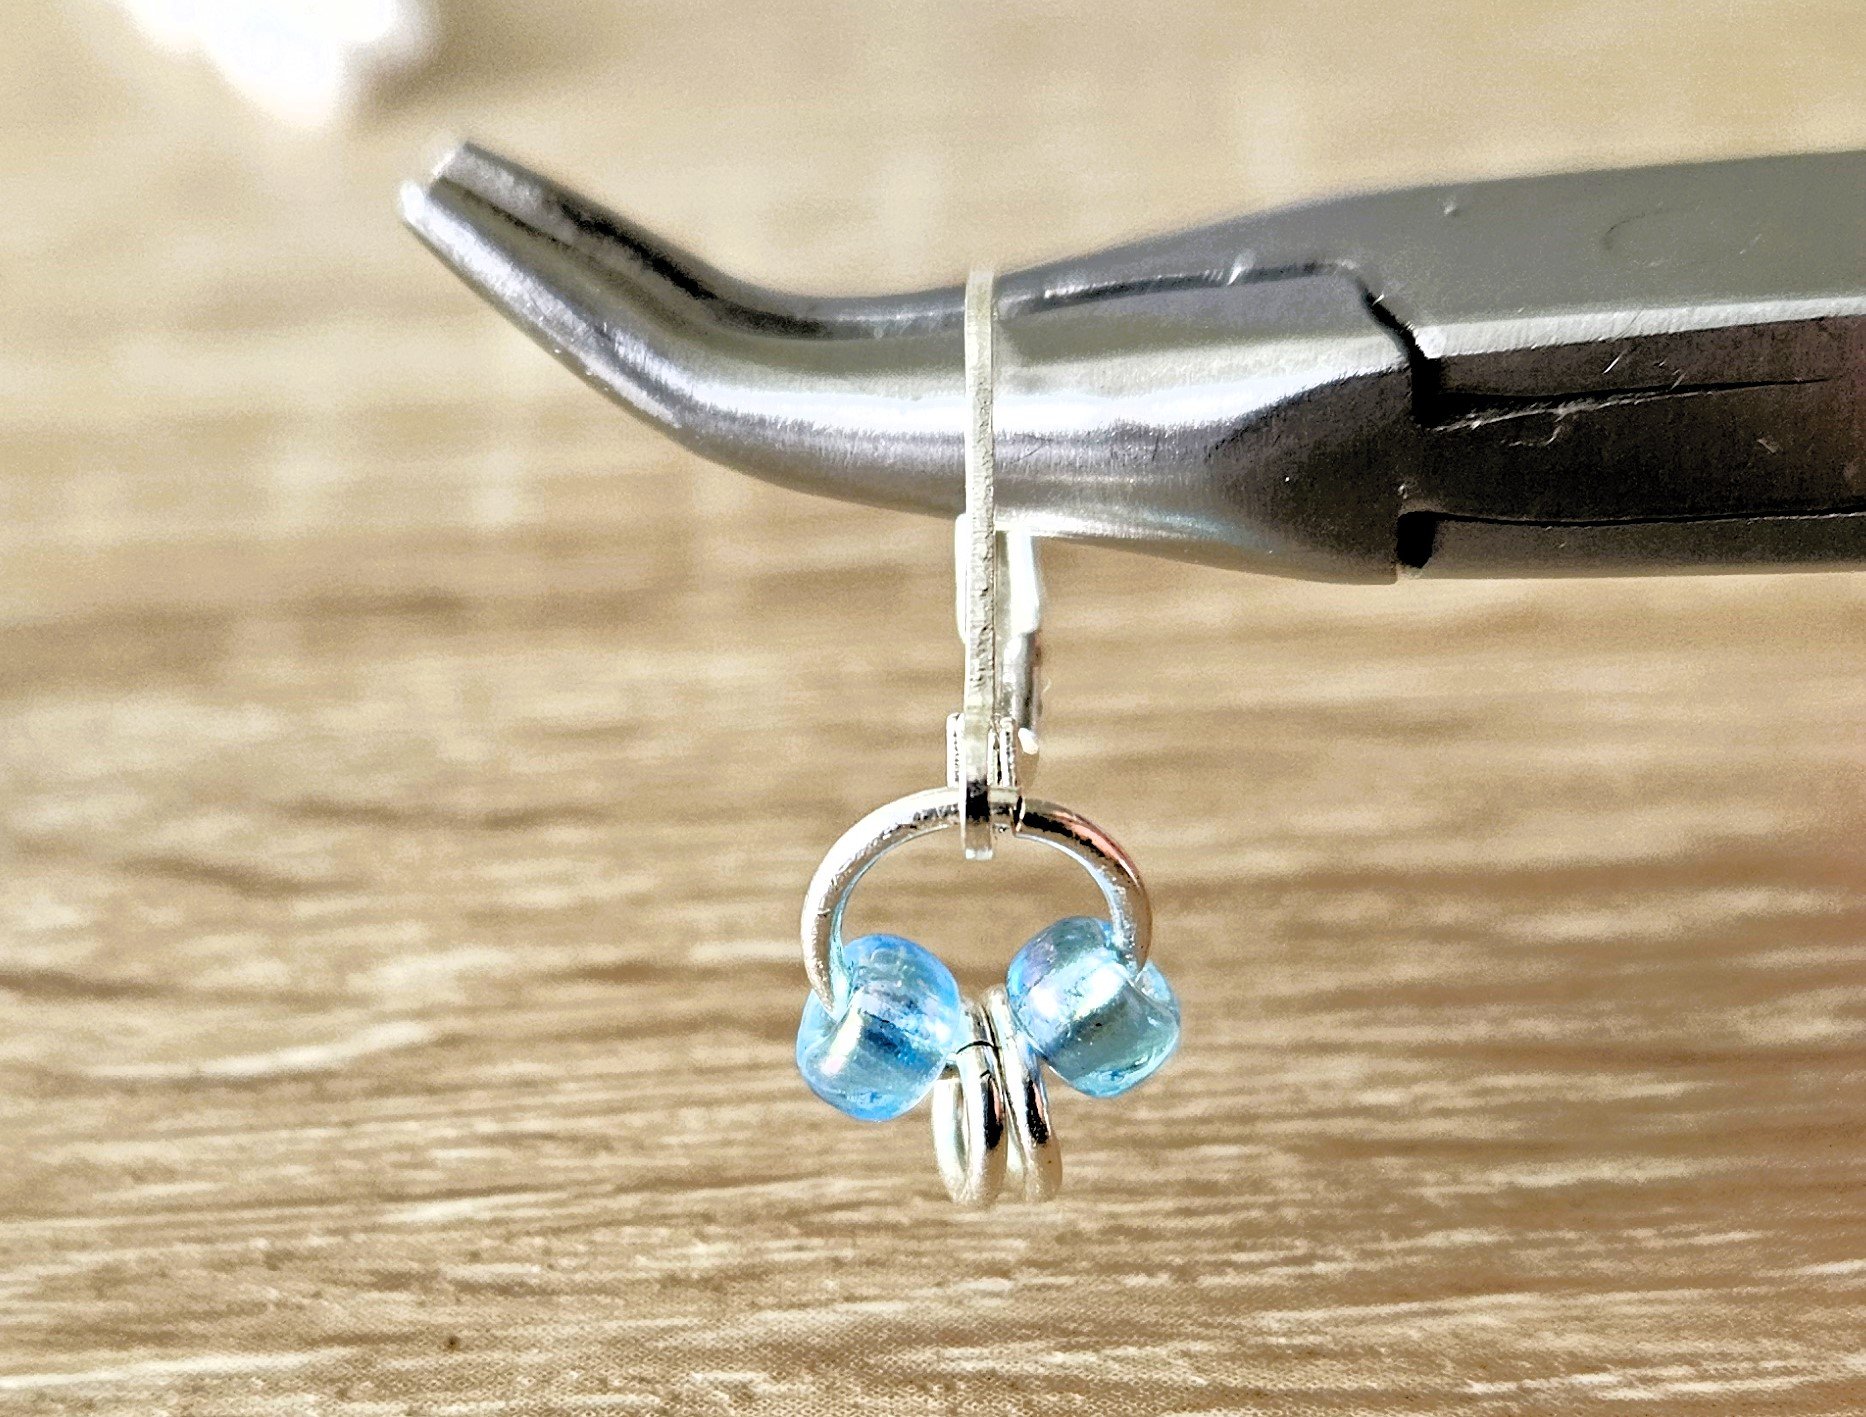
Flip your work back up and add a second large ring by weaving it through the 2 small rings that you added to the first large ring. Repeat steps 3 and 4 to complete the second unit.
Step 6:
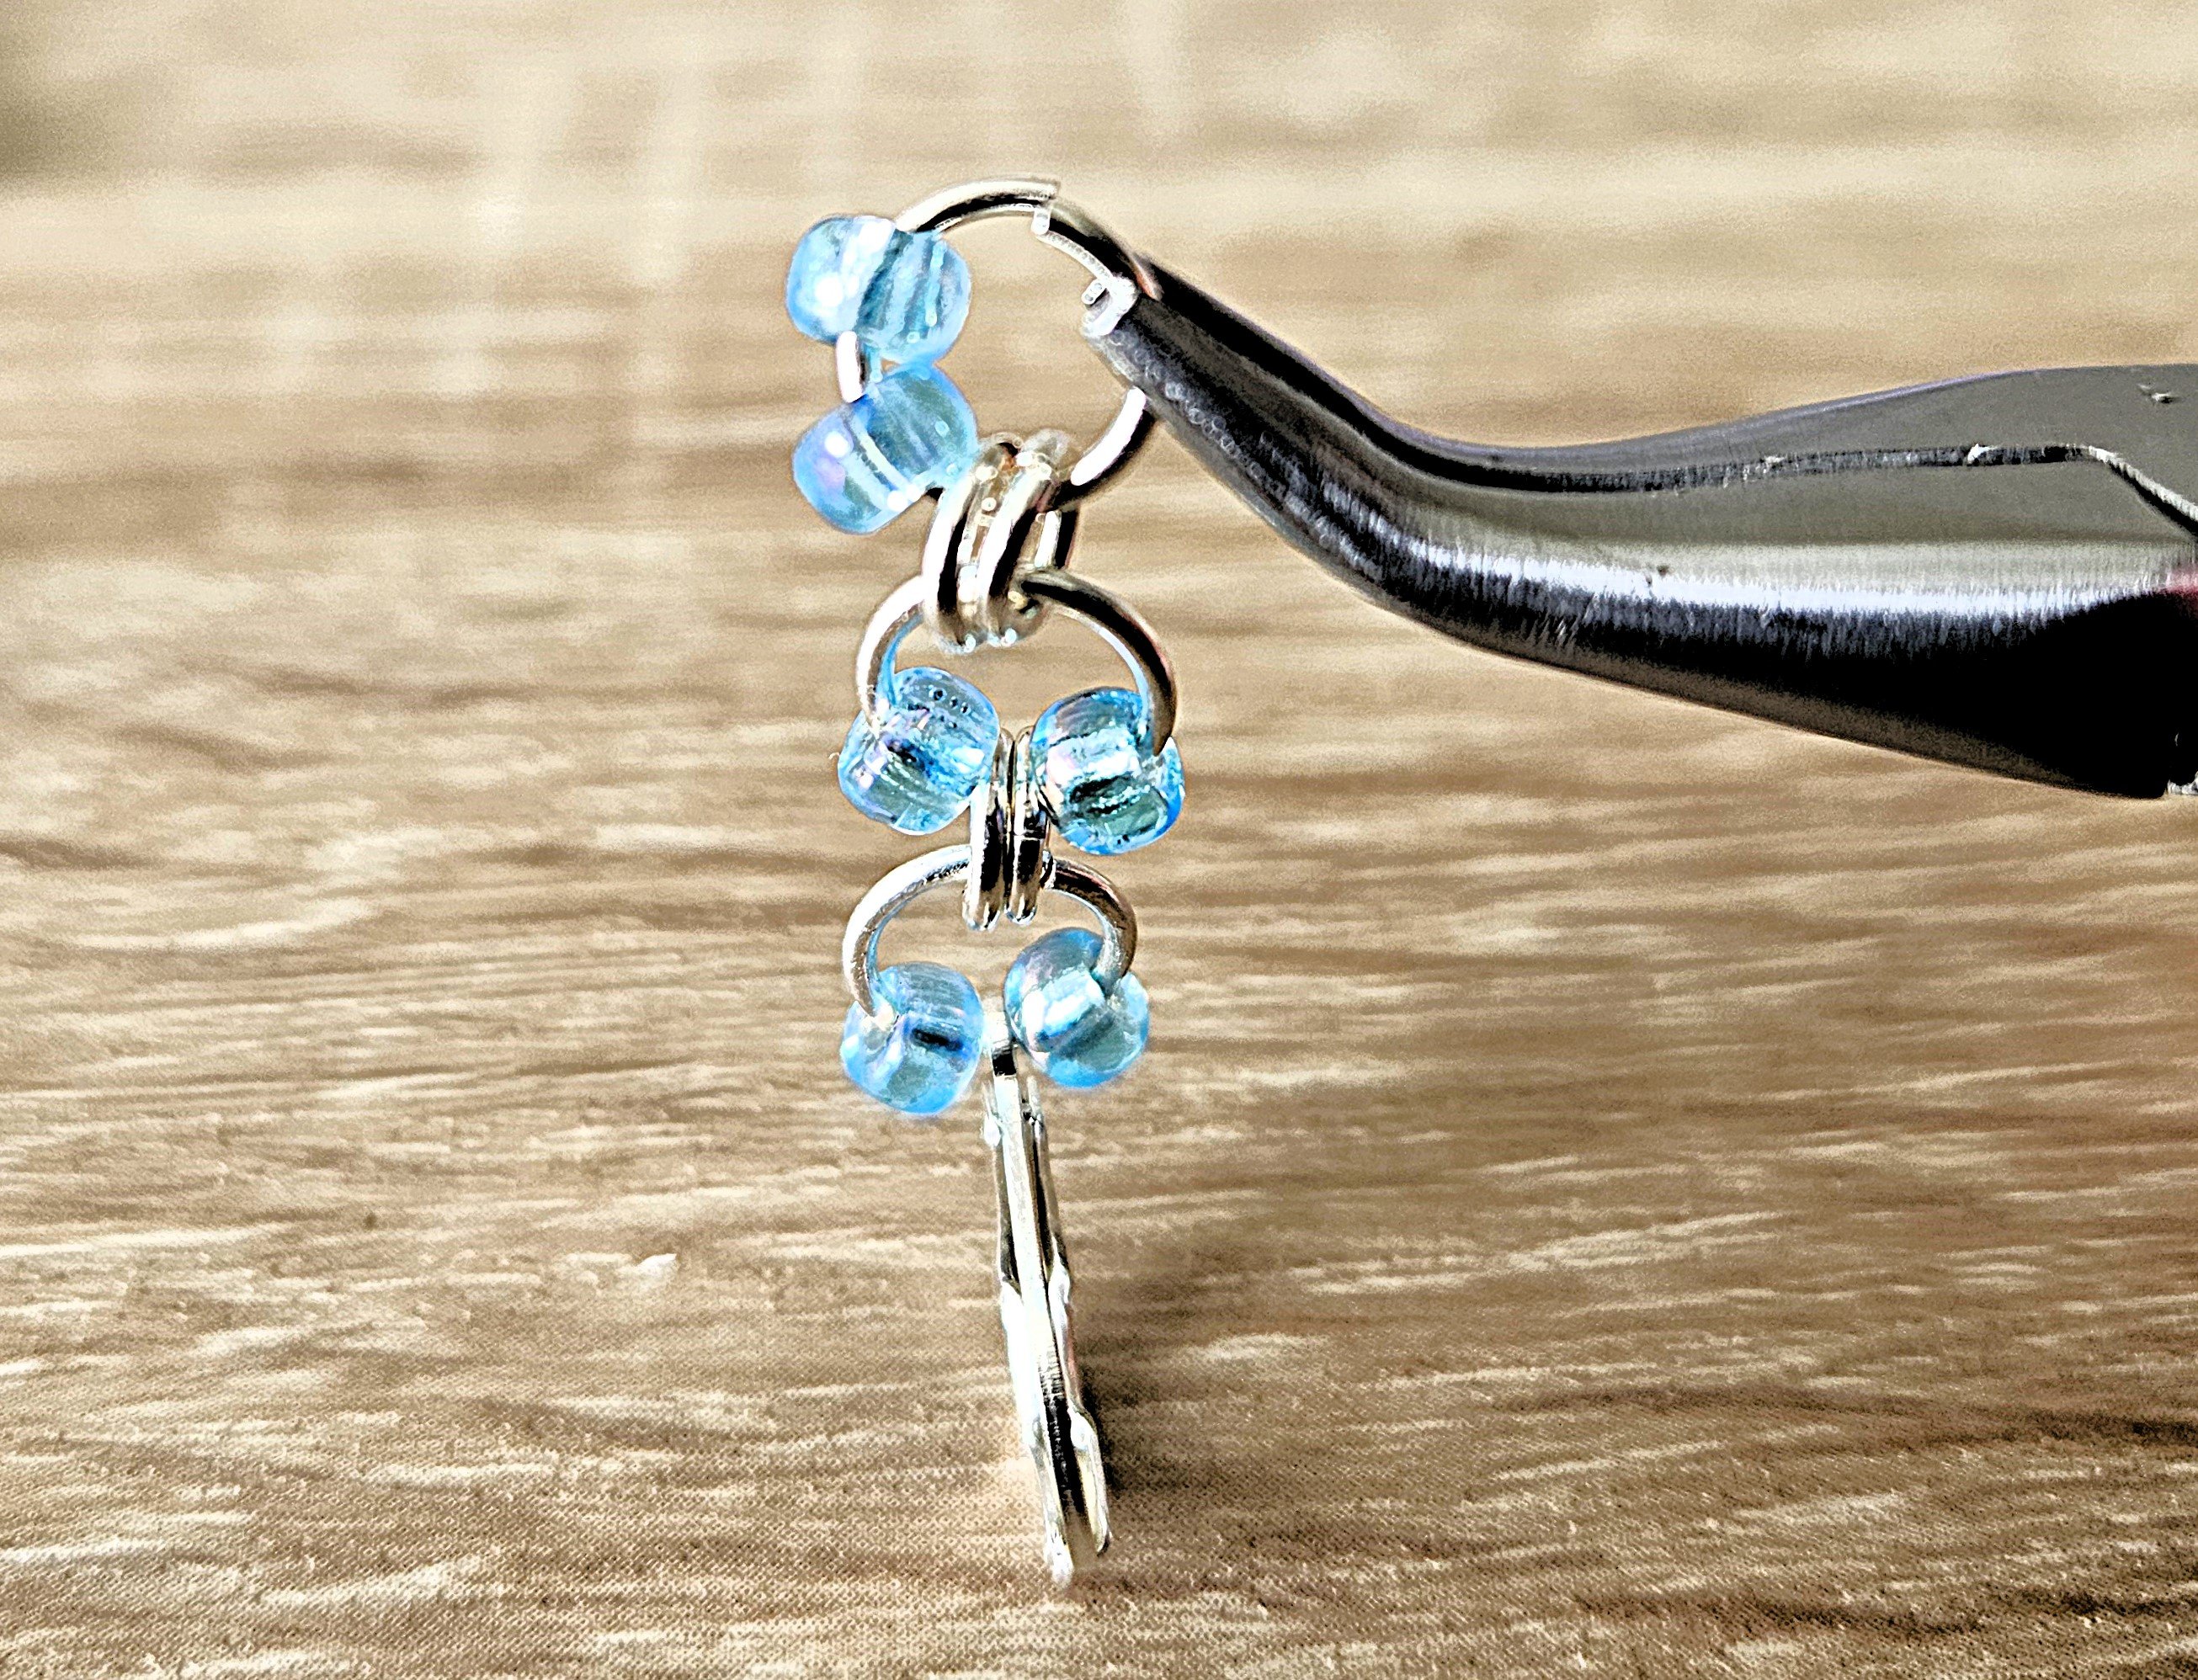
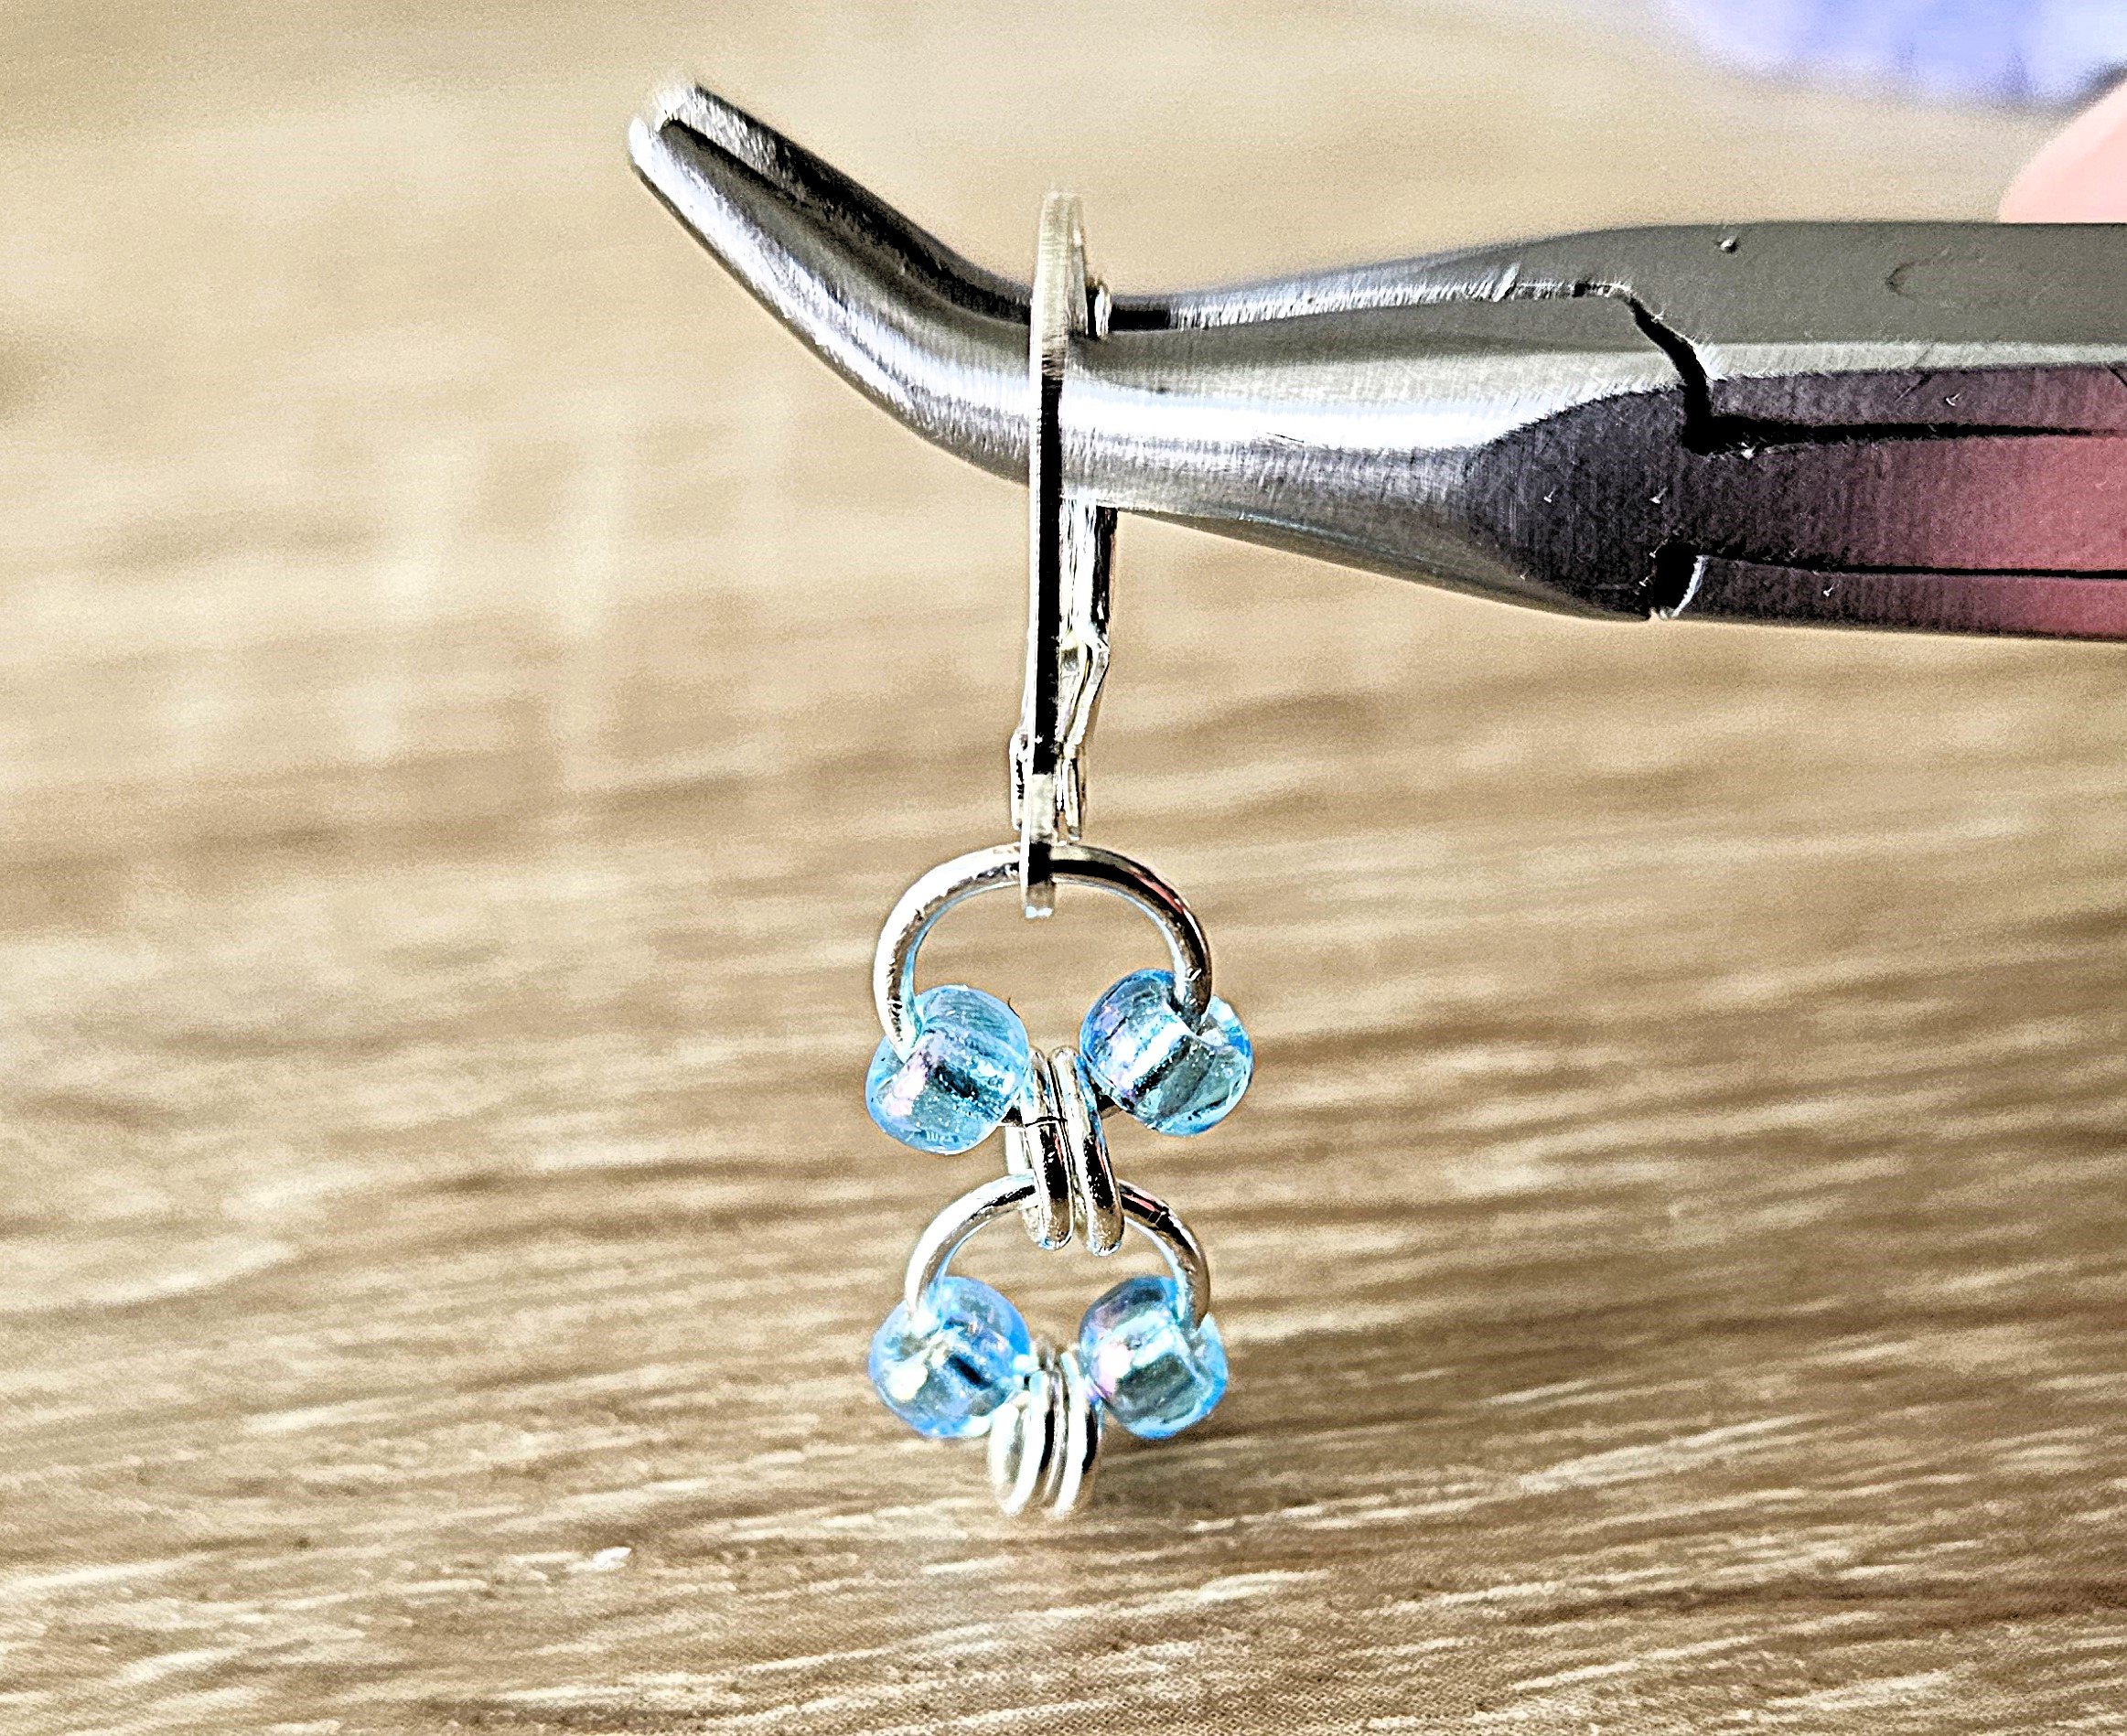
Add the third large ring by weaving it through the 2 small rings attached to the second large ring. This time, you only need to add 2 seed beads. Close the large ring.
Step 7:
Add a seed bead to your pre-opened small ring and leave the ring open.
Step 8:
Finally, loop that small ring through your third large ring, making sure that the seed beads on the large ring lie to either side, so that your final small ring will lie between those two beads when you flip it down.
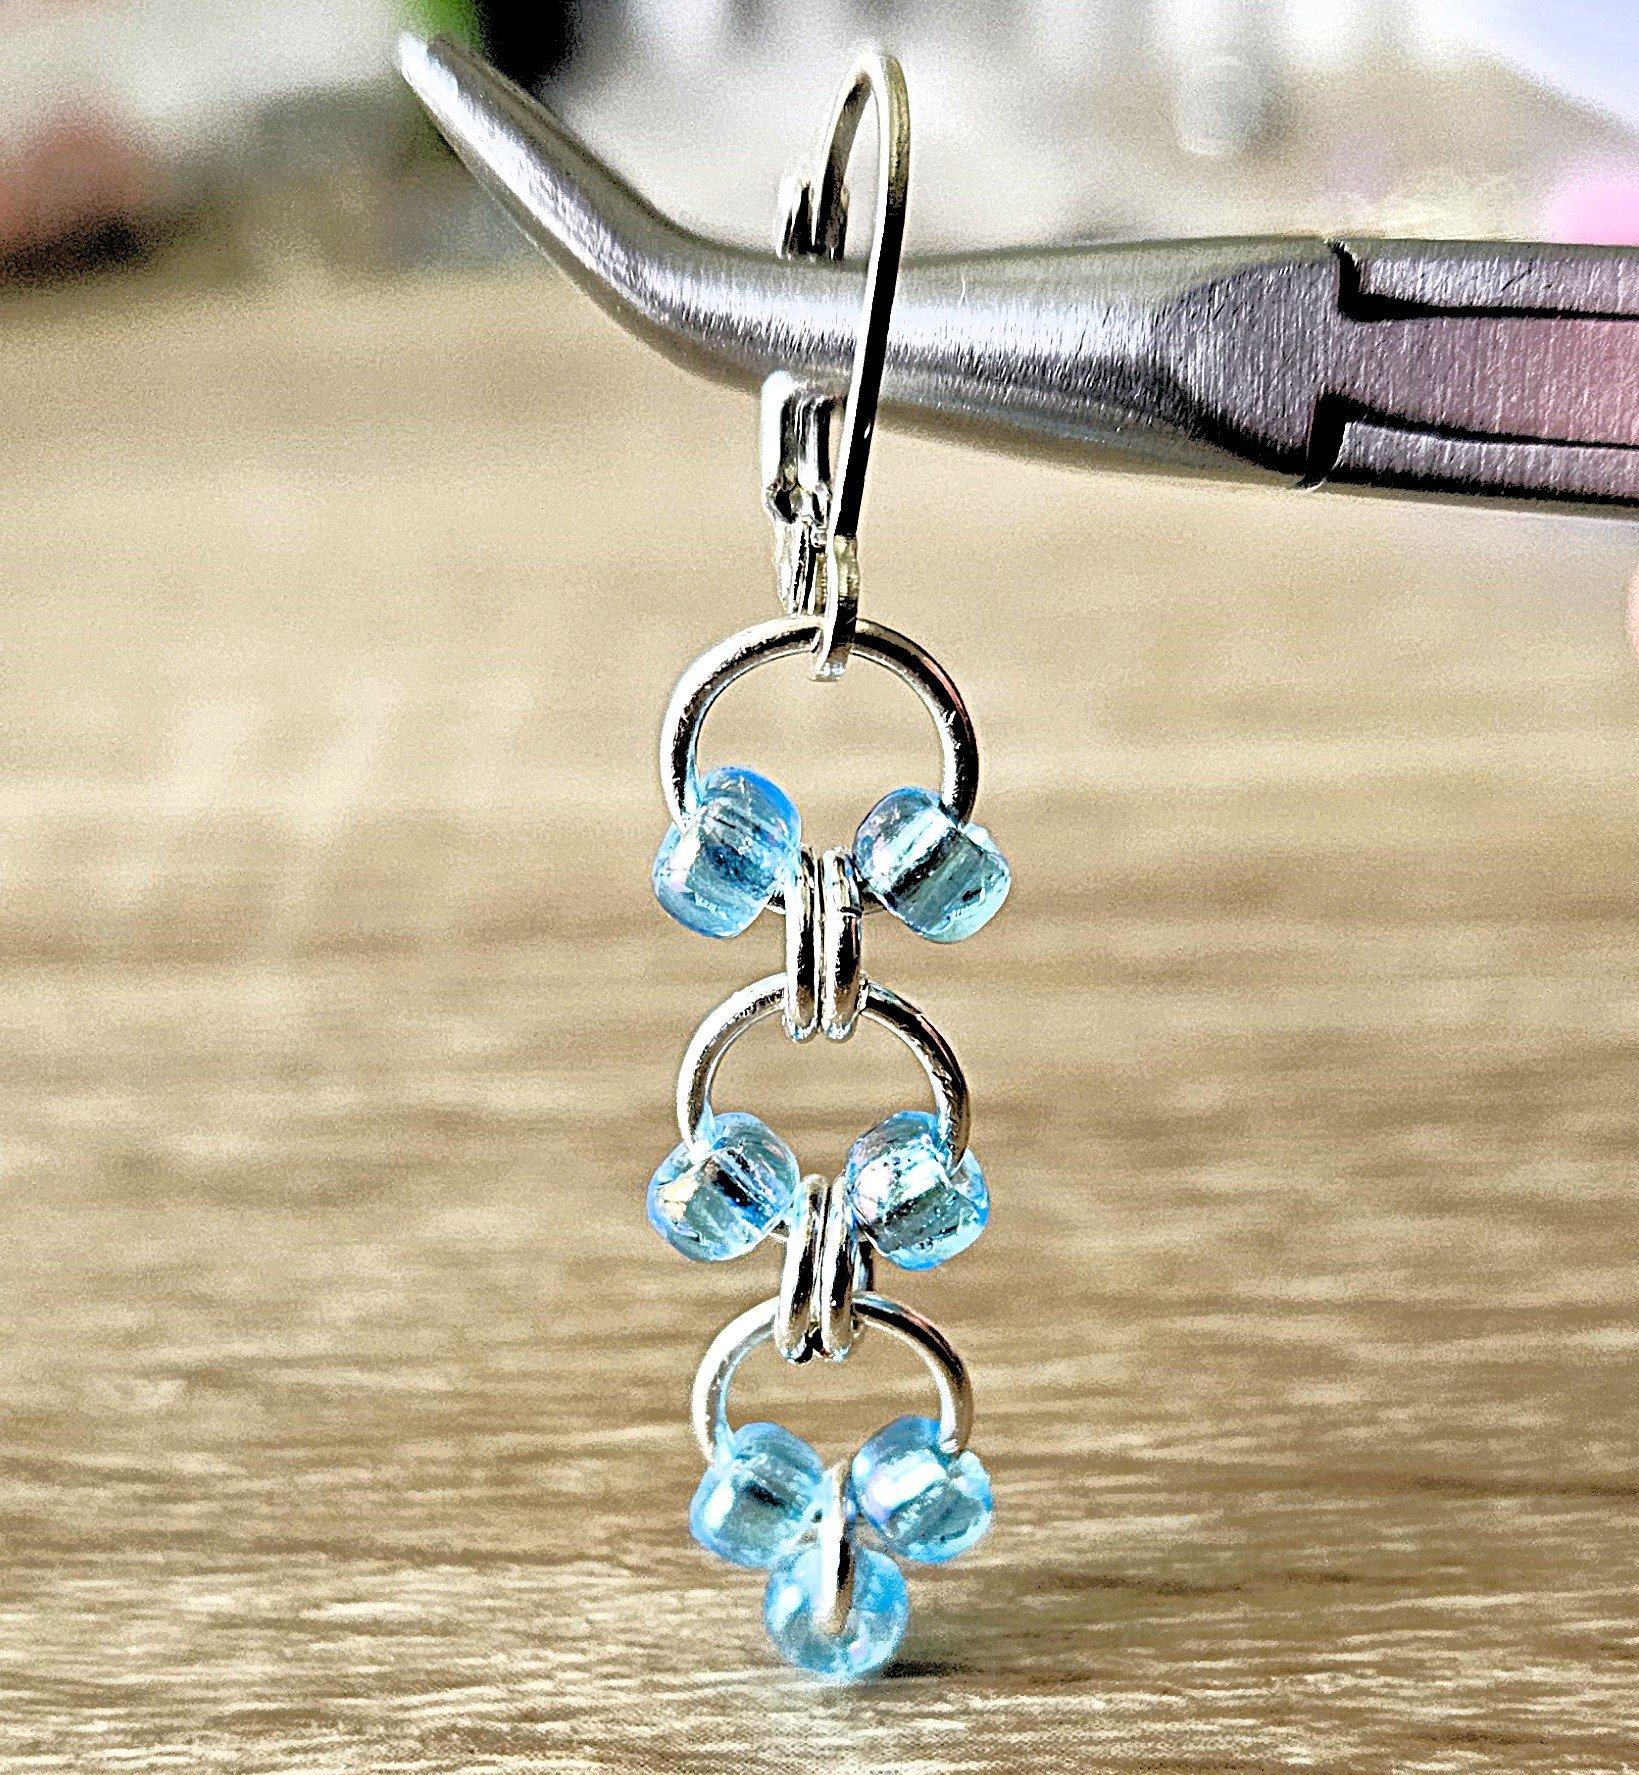
The first earring is done! :) Scroll back to step 1 for the second earring.
I hope you have enjoyed this first earrings series, featuring seed beads. I've selected 4 designs to go into a kit, so you can make them yourself without worrying about whether you have the right rings or beads. This kit is great value for money compared to buying the individual earring kits!